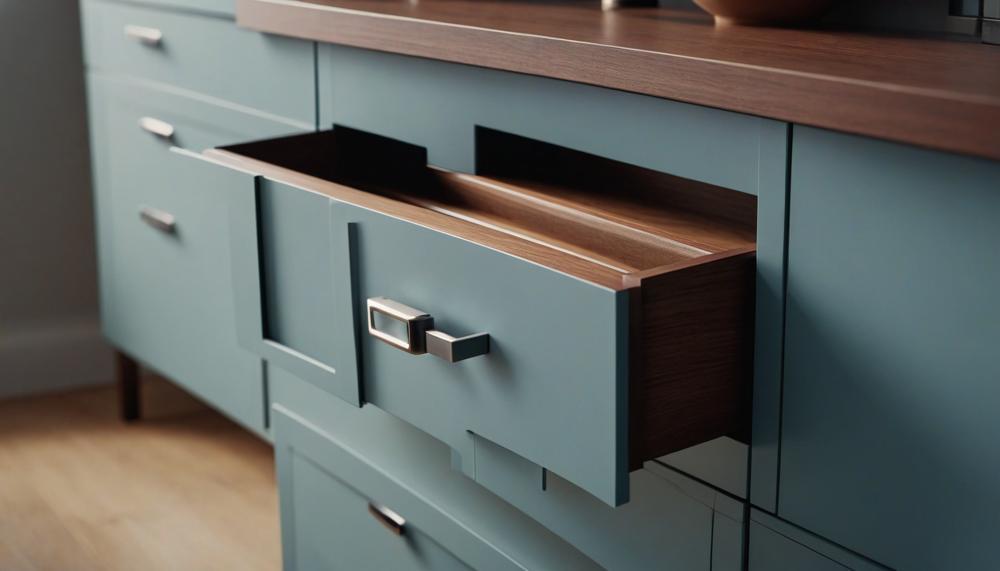
Removing a drawer without a lever can seem tricky, but it’s often simpler than you might think. Here’s how to do it smoothly and efficiently:
- Fully extend the drawer: Pull the drawer out as far as it will go.
- Lift the front of the drawer: Gently lift the drawer’s front to disengage it from the slide.
- Pull straight out: Continue pulling the drawer out while keeping it level.
Key points to remember:
- Check for screws or clips: Some drawers have these for extra security.
- Use tools if necessary: A screwdriver might be handy.
- Avoid tilting: Keeping the drawer level prevents damage.
- Consult instructions: Manufacturer guidelines can provide specific tips.
By following these steps, you’ll remove the drawer without hassle. If you encounter resistance, don’t force it—review the setup and proceed with care.
Contents
- 1 How to Remove Drawers With Metal Glides and No Levers
- 2 Empty And Clear Before Removal
- 3 Removing Without Levers: Pulling To Natural Stopping Point
- 4 Removing Wooden Slide Glides
- 5 Releasing Metal Glides Without Levers
- 6 Removing Stabilizer Screws And Anti-Tip Mechanisms
- 7 Different Removal Methods For Different Types Of Drawer Hardware
- 8 Conclusion
How to Remove Drawers With Metal Glides and No Levers
The most effective method for removing a drawer with metal glides and no levers without causing damage to the drawer or cabinet involves a few careful steps. Here’s a detailed guide:
| Step | Description | Tools Needed |
| Identify the Disconnect Tabs | Locate tabs at the back of metal tracks | None |
| Press and Hold the Tabs | Press tabs and gently pull the drawer | None |
| Slide the Drawer Out | Keep the tabs pressed and pull out the drawer | None |
| Check for Additional Screws or Clips | Look for any extra screws or clips and remove them | Screwdriver |
| Lift and Pull | Lift slightly and pull the drawer away | None |
| Use Appropriate Tools | Use a flathead screwdriver if needed | Flathead Screwdriver |
| Avoid Tilting or Angling | Keep the drawer level throughout the removal | None |
Empty And Clear Before Removal
Emptying and clearing a drawer before attempting to remove it is pivotal for several reasons. Firstly, it ensures safety by preventing accidental injuries. A full drawer can be unexpectedly heavy, leading to potential mishaps like dropping the drawer on your foot. Secondly, it helps protect the contents of the drawer. Fragile or valuable items can get damaged if they fall out during the removal process.
Additionally, clearing the drawer facilitates a smoother removal process. Without the extra weight and clutter, it’s easier to maneuver the drawer, reducing the risk of damaging the drawer itself or the furniture it’s housed in. Lastly, it allows for a thorough inspection of the drawer mechanism, ensuring no screws, clips, or tabs are overlooked.
Here’s a detailed breakdown of why you should always empty and clear a drawer before removal:
| Reason | Explanation | Example |
| Prevent Injuries | Heavy or awkwardly balanced drawers can cause injuries if dropped or mishandled. | A full drawer falling can injure your foot or hand. |
| Protect Contents | Items inside the drawer, especially fragile ones, can break or get damaged. | Glassware or electronics inside can shatter if the drawer is tipped. |
| Ease of Removal | Lighter, uncluttered drawers are easier to handle and remove. | An empty drawer slides out more smoothly without extra weight. |
| Avoid Damage | Reduces the risk of damaging the drawer, tracks, or furniture. | Prevents scratching or breaking the drawer’s wood or metal parts. |
| Inspect Mechanism | Makes it easier to see and access any screws, clips, or tabs that need to be disengaged. | Identifying and pressing disconnect tabs becomes straightforward. |
By adhering to these steps, you ensure a safer, more efficient, and damage-free process.
Removing Without Levers: Pulling To Natural Stopping Point
To safely and effectively remove a drawer without using a lever, follow these steps:
| Step | Description | Notes |
| Empty the Drawer | Remove all items from the drawer. | Prevents damage and makes the process easier. |
| Extend the Drawer Fully | Pull the drawer out until it stops naturally. | Identify the stopping point. |
| Locate the Stops | Find the small plastic tabs or levers on the slides. | Usually on the sides for side-mounted slides or underneath for undermount slides. |
| Release the Stops | Press or lift the tabs to disengage the stops. | Different mechanisms for side-mounted and undermount slides. |
| Pull Out the Drawer | Gently pull the drawer out while keeping it level. | Ensure smooth removal without tilting. |
Removing Wooden Slide Glides
| Step | Description | Tips |
| Empty the Drawer | Take out all items to reduce weight and prevent damage. | Ensure the drawer is completely empty for easier handling. |
| Fully Extend the Drawer | Pull the drawer out as far as it will go without forcing it. | Be gentle to avoid damaging the slide glides. |
| Locate the Stops | Identify the wooden stops or blocks that prevent the drawer from coming out completely. | These are often found near the back of the drawer slides. |
| Remove or Bypass the Stops | If the stops are removable, take them out. Otherwise, gently tilt or lift the drawer to bypass them. | Use a flashlight to see clearly if necessary. |
| Slide Out the Drawer | With the stops bypassed or removed, carefully pull the drawer out while keeping it level. | Move slowly to avoid any sudden movements that could cause damage. |
| Check for Hidden Screws | Some drawers may have hidden screws securing the glides. Check and remove these if present. | A small screwdriver can help with this step. |
| Seek Professional Help if Needed | If the drawer is stuck or difficult to remove, consider consulting a professional. | Better safe than sorry—avoiding potential damage is key. |
Releasing Metal Glides Without Levers
Removing a drawer with metal glides that lack levers is straightforward. Follow these steps to ensure a smooth process:
- Locate the Disconnect Tabs: Typically found near the back of the drawer on both metal tracks. These tabs need to be pressed simultaneously.
- Press and Pull: While pressing the disconnect tabs, pull the drawer outwards. This action releases the drawer from the tracks.
- Wiggle and Lift: If your drawer has no levers or buttons, apply gentle pressure to wiggle the drawer out. Lift it slightly until you hear a click, indicating it’s free from the track.
- Check for Obstructions: If the drawer is stuck, inspect the rail for any debris or obstructions. Use a putty knife to clear any blockages.
Removing Stabilizer Screws And Anti-Tip Mechanisms
To safely remove a drawer with no lever without damaging the stabilizer screws or anti-tip mechanisms, follow these detailed steps:
- Consult the Manufacturer’s Instructions: Always start by checking the specific instructions provided by the drawer manufacturer. Each drawer system can have unique mechanisms and guidelines.
- Prepare the Work Area: Clear any items from the drawer and ensure you have a clean workspace to avoid accidents or losing small parts.
- Locate the Stabilizer Screws and Anti-Tip Mechanisms: Identify where the stabilizer screws and anti-tip mechanisms are positioned. This usually involves inspecting the sides and bottom of the drawer.
- Gentle Removal Process:
- Fully Extend the Drawer: Pull the drawer out as far as it will go.
- Lift and Support: Lift the front of the drawer slightly to disengage the drawer slide from the stabilizer screws. Support the drawer to prevent it from tilting.
- Even Pull: Continue pulling the drawer out evenly and steadily, keeping it level to avoid putting pressure on the stabilizer screws or anti-tip mechanisms.
- Check for Obstacles: If the drawer doesn’t come out smoothly, check for hidden clips or stops that may need to be pressed or released.
- Avoid Angling the Drawer: Tilting or angling can cause damage. Keep the drawer level and pull it straight out to avoid bending or breaking any internal components.
- Professional Help: If you’re unsure or face difficulty, don’t hesitate to seek professional assistance to avoid damaging your furniture.
Different Removal Methods For Different Types Of Drawer Hardware
When tackling the removal of drawers with various types of hardware, each method demands a unique approach. Below, find specific techniques for common drawer systems, including the best method for drawers lacking a lever.
Metal-Glide Slides with Levers
Method:
Locate the levers on either side of the drawer.
Simultaneously press down on both levers.
Pull the drawer towards your body.
Explanation: Metal-glide slides with levers are straightforward. The levers release the drawer from the track, allowing it to slide out smoothly.
Wooden Center Track
Method:
Grasp the drawer firmly with both hands.
Apply steady force while pulling the drawer straight out.
Be prepared to lift the drawer slightly to disengage it from the track.
Explanation: Drawers with a single wooden center track may require more effort due to friction. Ensure to pull evenly to prevent the drawer from jamming.
Undermount Slides
Method:
Locate the release clips or tabs underneath the drawer.

Press the clips or tabs while pulling the drawer out.
Lift the drawer off the slides once it is partially out.
Explanation: These slides are less visible and often include hidden release mechanisms. Patience is key to avoid damaging the slides or the drawer.
Side-Mounted Ball Bearing Slides
Method:
Pull the drawer out until it stops.
Look for release levers on the slides, if present.
If no levers, use a flathead screwdriver to gently lift the drawer off the slides.
Explanation: Ball-bearing slides provide a smooth glide but may require tool assistance for release if levers are absent.
Drawers Without Levers
Best Method:
Hold the drawer with both hands.
Pull the drawer evenly towards your body.
If resistance is felt, gently wiggle the drawer side to side while pulling.
Explanation: Without levers, even force and patience are crucial. Avoid angling the drawer, which could damage the slides or the drawer itself.
Conclusion
Removing a drawer without a lever can feel challenging, but with a few strategic steps, it’s straightforward and damage-free. First, fully extend the drawer until it stops naturally. Check the sides for small plastic or metal tabs; these are the disconnect tabs that need to be pressed simultaneously. If your drawer has no visible tabs, gently lift the front of the drawer to disengage it from the slide mechanism.
It’s essential to maintain a level pull to avoid jamming or damaging the tracks. In some cases, additional screws or clips might be securing the drawer—use a screwdriver to remove these if necessary. For drawers with wooden slides, bypass the wooden stops by tilting the drawer slightly.
Always empty the drawer before starting to prevent accidents and ease the process. If you encounter resistance, don’t force it; double-check for any overlooked clips or tabs and consult the manufacturer’s guidelines for specific instructions.


