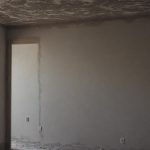
Is the grout between your tiles starting to crack and crumble? Don’t worry; fixing it is easier than you might think. Cracked grout not only looks unsightly but can also lead to more significant issues like mold growth. Let’s dive into how you can tackle this problem effectively and refresh your tile floor.
- Identify the Problem: Cracked grout can be a sign of underlying issues, but often, it’s just a result of wear and tear.
- Gather Your Tools: You’ll need a grout saw, a grout float, eye protection, towels, and a cleaning solution like vinegar and water.
- Clean Thoroughly: Before starting, make sure to clean the grout lines to remove any dirt or debris.
- Remove Damaged Grout: Carefully use the grout saw to remove the cracked grout, taking care not to damage the surrounding tiles.
- Apply New Grout: Mix and apply the new grout using the float, pressing it firmly into the gaps.
- Clean and Seal: Wipe off excess grout with a damp towel and let it cure. Consider sealing the grout to protect it from future damage.

Repairing grout is a budget-friendly and straightforward way to enhance the look of your tile floor. If the problem persists, it might be time to consult a professional to check for deeper issues with the underlayment. Happy grouting.
Contents
Step 1 – Try Grout Caulk
Grout caulk is a flexible, water-resistant sealant designed to repair cracked or damaged grout in tile floors.
This specialized caulk helps fill gaps between tiles, creating a smooth, uniform surface that prevents moisture from seeping through and causing further damage. Unlike traditional grout, grout caulk remains flexible after drying, allowing it to withstand minor movements in the tile without cracking.
How Grout Caulk Helps in Fixing Cracked Grout
| Feature | Benefit | Application |
| Flexibility | Adapts to minor movements and prevents further cracking. | Ideal for areas prone to slight shifts, such as kitchen and bathroom floors. |
| Water Resistance | Prevents water from seeping through and damaging the substrate. | Suitable for wet areas like showers and near sinks. |
| Ease of Use | Can be applied directly to the cracked area without removing all the old grout. | Perfect for quick, DIY repairs. |
| Antimicrobial Properties | Resists mold and mildew growth, ensuring a cleaner environment. | Useful in bathrooms and kitchens where moisture is common. |
Application Steps
- Clean the Area: Thoroughly clean the grout lines with a vinegar and water solution to remove any dirt or mildew.
- Remove Loose Grout: Use a grout saw to carefully remove any loose or damaged grout.
- Apply Grout Caulk: Squeeze the caulk into the grout lines, ensuring even coverage.
- Smooth the Surface: Use a damp finger or a caulk smoothing tool to create a smooth finish.
- Allow to Dry: Let the grout caulk cure as per the manufacturer’s instructions, usually 24-48 hours.
For more detailed information on grout caulk, you can visit this Home Improvement Guide.
Step 2 – Find Matching Grout
To determine the right color and type of grout for fixing cracked grout on a tile floor, follow these steps:
Identify the Grout Type
- Cement-Based Grout: Common in many homes, it comes in sanded and unsanded varieties.
- Epoxy Grout: Durable, stain-resistant, and ideal for high-traffic areas.
- Furan Grout: Highly chemical-resistant, typically used in industrial settings.
Colour Matching
- Visual Inspection: Compare grout color swatches to the existing grout.
- Dry and Wet Matching: Check the grout color when both dry and slightly damp, as grout can change color when wet.
- Test Samples: Apply small amounts of different grout samples in an inconspicuous area to see which matches best when dried.
Use Grout Color Guides
- Manufacturers’ Charts: Most grout manufacturers provide color charts.
- Online Resources: Websites like Custom Building Products offer extensive color guides and matching tools.
Grout Quantity
- Calculate the area needing repair to determine the amount of grout required. This ensures you have enough material to complete the job without interruptions.
Professional Advice
- Consult with a local tile store or a professional tiler for expert advice on matching grout types and colors.
Step 3 – Mix the Grout
Properly mixing grout is essential for repairing cracked grout on a tile floor. Here’s a step-by-step guide:
Prepare Your Workspace and Materials
- Ensure all tools are clean.
- Have your grout powder, water, a mixing container, a margin trowel, and an electric drill with a paddle mixer ready.
Mixing Process
- Combine Grout and Water: Add water to the mixing container first. Then, gradually add grout powder. This helps prevent clumps. The typical ratio is one part water to two parts grout, but always follow the manufacturer’s instructions.
- Initial Mixing: Use a margin trowel to blend the mixture. Stir slowly to avoid air pockets, which can weaken the bond. Aim for a thick, peanut butter-like consistency.
- Use a Paddle Mixer: Attach a paddle mixer to an electric drill. Blend the grout thoroughly for about 5 minutes on a low speed to maintain the ideal consistency and remove any lumps.
Allow the Grout to Slake
- Rest Time: Let the grout sit undisturbed for 10 minutes. This process, known as slaking, allows the ingredients to activate and ensures a consistent mix.
Final Mixing
- Re-mix: After slaking, stir the grout again for about 2 minutes. This final mix ensures the grout is homogeneous and ready for application.
Adjust Consistency
- Too Watery: If the grout is too runny, sprinkle in a bit more dry grout powder and mix until the desired consistency is achieved.
- Too Stiff: If the grout is too thick, add a small amount of water gradually and mix thoroughly.
Step 4 – Fill in the Crack
Filling in a crack in grout on a tile floor involves a few straightforward steps to ensure a seamless repair. Here’s how to do it properly:
Prepare the Area
- Clean the crack thoroughly using a vacuum or a brush to remove any debris or loose grout.
- Dampen the area with a wet sponge, ensuring it’s moist but not soaking wet.
Mix the Grout
- Follow the instructions on your grout package to mix it to a peanut butter-like consistency.
- Let it sit for a few minutes before applying.
Apply the Grout
- Use a grout float held at a 45-degree angle to the floor.
- Spread the grout over the crack, pressing it firmly into the gap to ensure it’s completely filled.
- Drag the edge of the float over the grout-filled gap slowly to smooth it out.
Remove Excess Grout
- Scrape up any excess grout using the edge of the float, making it flush with the rest of the floor.
- Check all joints to ensure they are entirely filled.
Clean the Tiles
- Wait about 15 minutes for the grout to set slightly.
- Wipe off excess grout from the tile surfaces with a damp sponge, rinsing the sponge frequently.
Final Touches
- Allow the grout to cure for at least 24 hours.
- Once cured, buff the tiles with a dry cloth to remove any remaining grout haze.
Step 5 – Remove the Old Grout
To safely and effectively remove old grout from your tile floor, follow these steps:
| Step | Tool/Method | Safety Tip |
| Power Tool Use | Grout removal tool, Rotary tool | Steady hand, avoid chipping tiles |
| Remove Loose Pieces | Flathead screwdriver, Chisel | Work carefully to avoid damage |
| Manual Scraping | Grout saw, Utility knife | Gently scrape to avoid tile damage |
| Protective Gear | Goggles, Gloves | Protect from debris |
| Chemical Remover | Commercial grout remover | Follow instructions carefully |
| Cleaning | Vacuum, Damp cloth | Thoroughly remove dust and debris |
| Take Breaks | Regular intervals | Avoid fatigue, reduce injury risk |
Step 6 – Install Grout
To properly install grout and fix cracked grout on a tile floor, follow these detailed steps:
| Step | Action | Details |
| 1 | Remove Damaged Grout | Use a grout saw, moving back and forth over the damaged line. |
| 2 | Clean the Area | Wipe with a damp cloth to remove dust and debris. |
| 3 | Prepare New Grout | Mix according to instructions, achieving a peanut butter consistency. |
| 4 | Apply the Grout | Use a grout float, holding at a 45-degree angle, to fill the joints. |
| 5 | Remove Excess Grout | Wipe away excess with the edge of the float. |
| 6 | Clean Tile Surface | After 15-30 minutes, clean with a damp sponge. |
| 7 | Final Clean and Polish | Polish tiles with a dry cloth after grout has cured. |
| 8 | Cure the Grout | Allow at least 24 hours before water exposure. |
Conclusion
Fixing cracked grout on tile floors might seem challenging, but with the right approach, it’s a manageable and rewarding task. Start by identifying the issue: cracked grout can signal underlying problems, but it’s often just wear and tear. Gather essential tools like a grout saw, float, and cleaning supplies. Thoroughly clean the grout lines to remove dirt and debris, then carefully remove the damaged grout without harming the tiles.
For smaller cracks, grout caulk is an excellent solution. It’s flexible, water-resistant, and easy to apply directly to the cracked area. Ensure a smooth finish by using a damp finger or caulk smoothing tool. For larger repairs, matching the new grout to the existing one is crucial. Determine whether the grout is cement-based, epoxy, or furan, and use color swatches or test samples for a perfect match. Properly mixing grout is vital; achieve a peanut butter-like consistency by combining water and grout powder gradually, allowing it to sit before a final mix.
Apply the new grout with a float, pressing it firmly into the gaps. Once set, clean off any excess and let it cure. To prevent future damage, consider sealing the grout. If problems persist, consulting a professional may be necessary to address deeper issues.